Will this work with an '07 srt8?
Just wondering if I could do this to my car.
You gave GREAT INFORMATION!
Also, do you know of a reliable electronic mod for my car?
I'm hungry for more speed!!!!!!!
Thanks,
drdialtone...
To remove the floor console, please follow these instructions:
Remove the chrome shifter bezel first. It has 4 tabs the go straight down from the edge of the bezel, and each tab has little ridges to help hold it in place. Place a thumb on each side of the inner rim and work it straight up. It'll pop right off.
Next, remove the semi-curved rubber tray that sits in front of the silver shifrer bezel. There are two screws there, remove those and set them aside. Next, it is easiest to remove the center bezel for the radio & a/c. To remove this, you'll use the slot just above the ashtray to get some grip. Apply a bit of pressure...enough to grip it without slipping, to the top of the inside of the slot. Kinda like you were gonna pick the dash up with that slot. You won't need to push up very hard...again, just enough to get some grip. With that grip, you'll pull the bezel towards the shifter. There are 6 tabs that you'll be releasing. Two are at the bottom corners of the bezel. Two more just at the top of the radio, on the outer edges, and the last two at the very top.
Once you've freed the bezel, carefully disconnect the wires from the back of it and set the bezel aside. Now you can move on to the ash reciever panel.
there are two clips on this panel at the very top on the outer edges. With the center bezel removed, you should have tons of room to get a firm grip on this panel to pull it out. Again, pull it towards the shifter. This panel has 3 wire sets hooked to it. (If you have the heated seats.) One for each heated seat button, and one for the cig lighter in the ashtray. You can choose whether or not to disconnect them if you wish. Either way, you'll find a screw just below the hole where the clips attatched on either side. Remember that when reassembling everything, this panel must be reinstalled FIRST after the floor console has been replaced into its proper position. If you replace the center stack bezel first, you won't be able to get this panel back in because of the cig lighter plug sticking out too far.
With these 4 screws removed, you only have the remaining 3 bolts to remove from the bottom of the bucket under the rubbery insert at the bottom. Remove those 3 bolts, and the entire floor console will be free.
To remove the console easily, put your key in the ignition and turn it to ACC. apply the parking brake firmly, and then apply the brakes. Place the car in [N] to move the shifter out of the way so allow the console to slide out easily. While you're at it, tune into your favorite radio station so you've got something to listen to.
![Image]()
Pulling the console out is pretty simple, just aim the rear vents toward the roof, so that you've got a "handle" to use on the rear of the console. With your cupholder open, use the ridge at the top of the cupholder area, where the top of the door meets the trim to grasp the console with your other hand. Easily work the console towards the rear seats, and up slightly to free it from the rear vent air passage. Slide the console back a few inches, and then lift the entire front of the console straight up. This will give you access to the cig lighter connector for the adapter in the bucket. This connector has a clip shaped like a rounded "M" that you'll need to depress to free it. Once it's released, keep the front up, and lift the back of the console and slide it back the rest of the way onto the rear seats. This will give you all the room you need to work.
Once you've completed the mod, simply reverse the entire process to put everything back together.
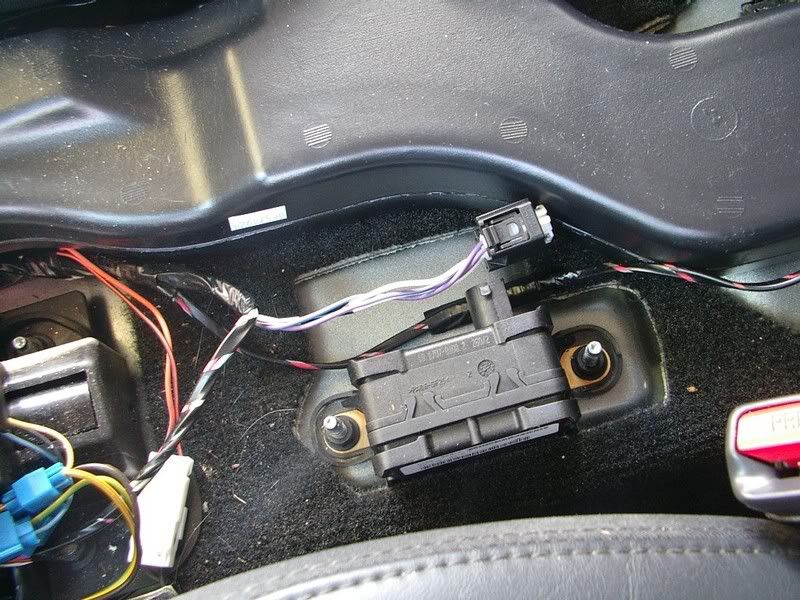
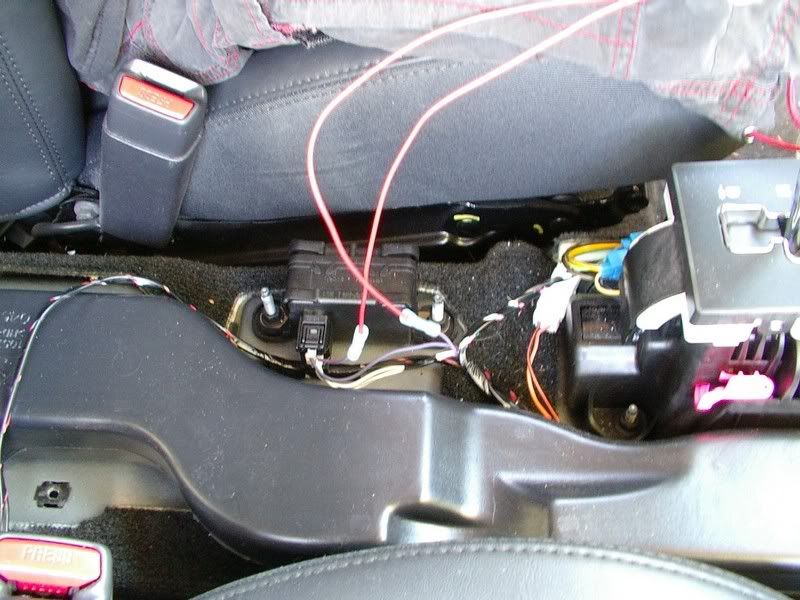
Once you have the floor console removed, you'll see the module bolted down to the floor, behind the shifter assembly by two bolts, with a wire harness plugged in that contains the 4 wires discussed earlier.
Here is a pic of the module taken from the driver's seat. I have already unplugged the harness here.
We will be basically doing the same thing as unplugging this module, except we're doing it with a switch spliced into the positive power wire.
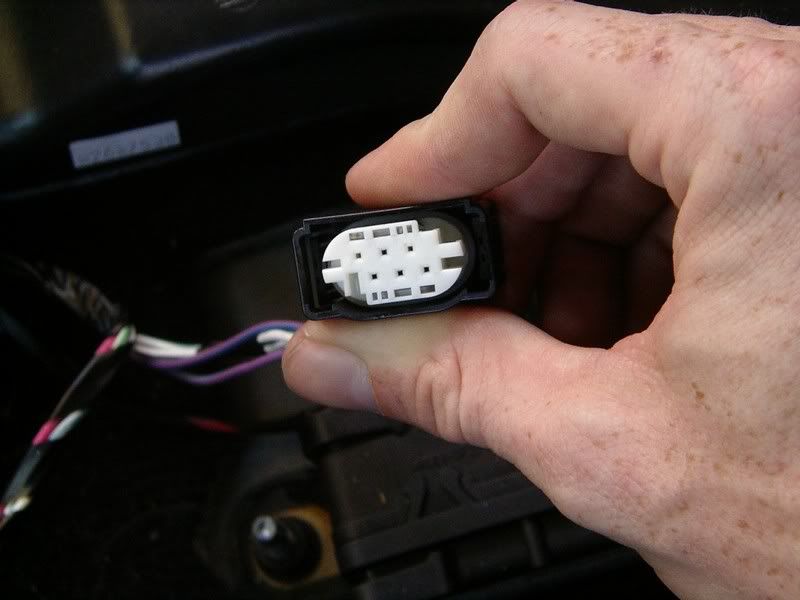
Here you can see the pin-side of the connector. It does has 6 pinouts, but only 4 are actually used. The only reason I can imagine for having a 6-pin connector is for future use. Potentially a different module that could be used later on that uses 6 wires instead of 4.
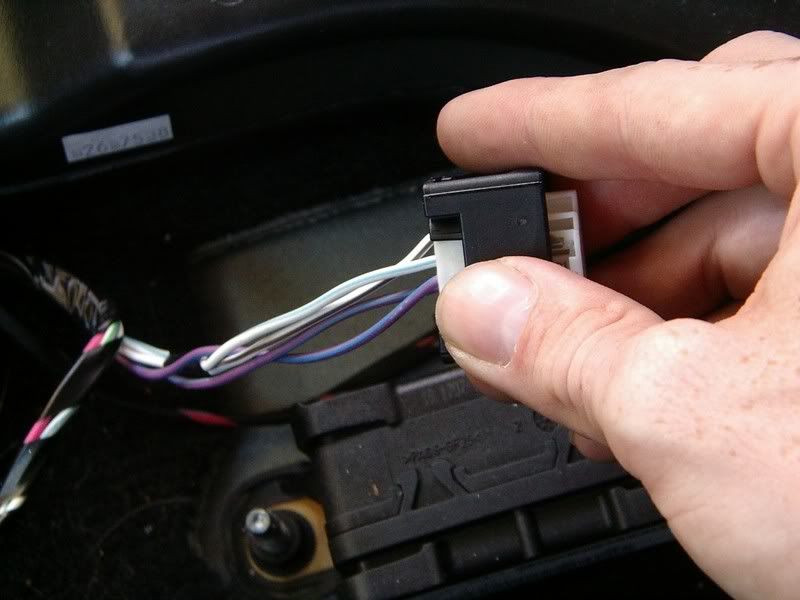
Here you can see the 4 wires we're working with. The two we're concerned with are the purple wires with blue stripes. The negative wire is the one with the DARK BLUE stripe. We are not cutting this wire. The wire with the LIGHT BLUE stripe is the positive power wire, and the one we will be modifying.
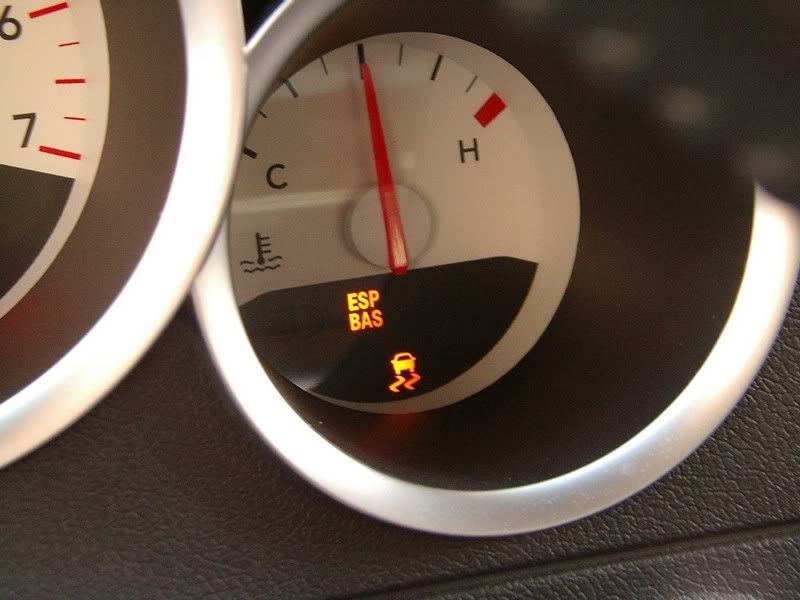
At this point, you can start your car if you want and you will see immediately that your ESP/BAS and Traction Control lamps both illuminate and stay on. This is the proper result of initiating the disable. You will also be greeted with a chime.
Now lets modify the wire! We are going to cut the
PURPLE wire with the
LIGHT BLUE stripe, like this:
Once this wire has been cut, strip a very small amount of the jacket from one side of the harness wire, and from one of the wire strands. No more than about 3/8"-1/2" should be stripped from each end. Here you will use one of the butt connectors , and the strand of wire, and splice them together. Once you have completed this, strip the other end of the splice wire (shown in red below) and crimp on one of the switch connectors.
Now repeat the above step to attatch the second wire to the other harness wire. When done, you should now have two long strands that extend the length of the original snipped wire.
Now you should grab your switch. It's time to test everything and make sure it all works properly. The switch I chose had a ground terminal. We won't need this terminal. If the switch you use has 3 terminals, one is a ground, and the other two will be used to allow power to pass through or not.
Connect your wire ends to the terminals, like this:
At this point you should reattatch the connector to the DSS module so we can test the install.
Be sure the switch is in the ON position before you start the car, just for the purpose of this test. Once you have confirmed this, go ahead and start the car. Allow all of your dash lights to go out like normal. Do not touch your stock ESP Disable button, you won't need to anymore anyway. Flip the switch, and your ESP/BAS Light, and Traction Control light will both illuminate like I pictured above. You will also get a chime. If you get all of this, then your install is functioning properly!
Now you must choose a location to install the switch on the floor console. I chose to install mine inside the "bucket" where the coin holders are. I mounted it just below the slot for the quarters, and set it so that the switch in the ON position is faced towards the wall of the bucket. This will reduce the possibility of something inside the bucket from knocking the ESP off without warning.
You can get to the wire above right under the shifter bezel there is a group of wires. Pull out the clip holding them down and you can access the light blue/violet wire and run your switch into the ashtray.[/quote]